
One of the best holiday side dishes ever, GREEN BEAN CASSEROLE! But make it gluten AND dairy free! I first wrote this recipe about 4 years ago, and the photos were horrible and the recipe needed some tweaking. I’m bringing you the updated version, but copying the blurb I wrote, because I just love sharing a bit about how the dish came about. I’ve made this dish for Thanksgiving and sometimes Christmas or times in-between for years now, and it is always a crowd favorite! I’ll note in the recipe as well, but pretty much all of it can be done in advance if you want since making it from scratch is a bit of a commitment!
Jump to RecipeFrom the first post of the recipe, about 4 years ago now.
Thanksgiving has always been one of my favorite days of the year. Probably the foodie in me getting to eat so many different things in one meal! Green bean casserole is one of my favorite side dishes on Thanksgiving – a one-to-one tie with stuffing. I’ve been gluten and dairy free for about 3 years now and I have been on a mission to find a comparable green bean casserole recipe to serve on Thanksgiving. The recipes I’ve tried didn’t come close to what I had hoped for, usually they were watery, fell apart and the flavor just wasn’t right. The first year I went the route of making the sauce with cashews- that is too much work for me and the texture is a little weird. Last year I tried a recipe that used pureed parsnips and that was a little better but made the whole dish taste like carrots. The other problem is that fresh beans release water even after they are blanched or boiled and that just ruins the consistency of the whole dish.
Of course, this year I had to try my hand at creating my own version of Green Bean Casserole that would live up to all of the thick, creamy deliciousness of the old version. Growing up I always had a hand in preparing Thanksgiving dinner. It’s always been one of my fondest memories spending time with my Great-Grandma and Grandpa in the kitchen and learning the recipes that they had been making for generations of our family. Of course, now food preferences have changed and I want to try to make everything a little healthier. There should never be guilt around your Thanksgiving meal, but you also shouldn’t settle for boring steamed veggies! I had the idea to bake the beans first to try and get some of that excess water out and hopefully get them to crunch up a bit and the result was just what I was hoping for.
I have made this a few times now and I can say it is SO good that I can’t wait to make it and eat it again for Thanksgiving and leftovers! This year I am not going to be self-conscious about serving a sub-par GB Casserole, because everyone will be floored that it’s really dairy and gluten free. Impress your guests, I dare you!
I hope everyone has a wonderful Thanksgiving day and weekend!
Green Bean Casserole – Gluten & Dairy Free
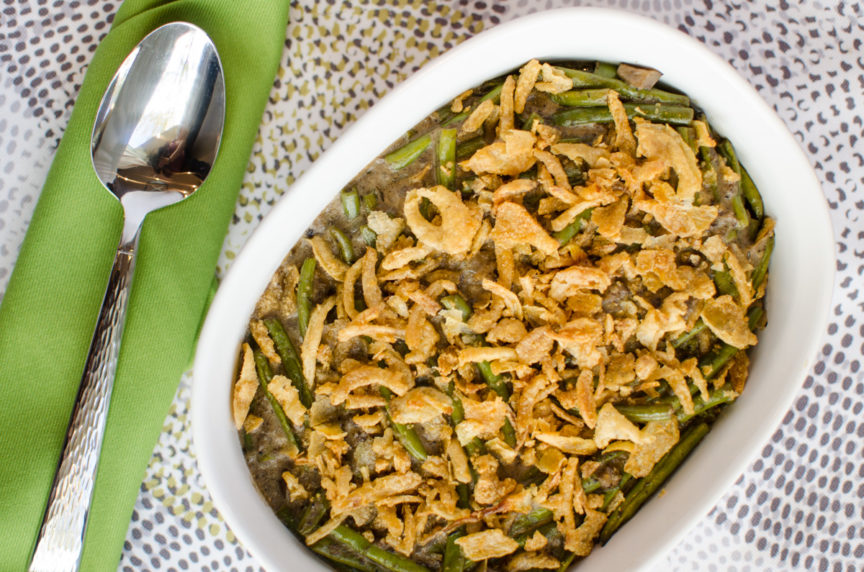
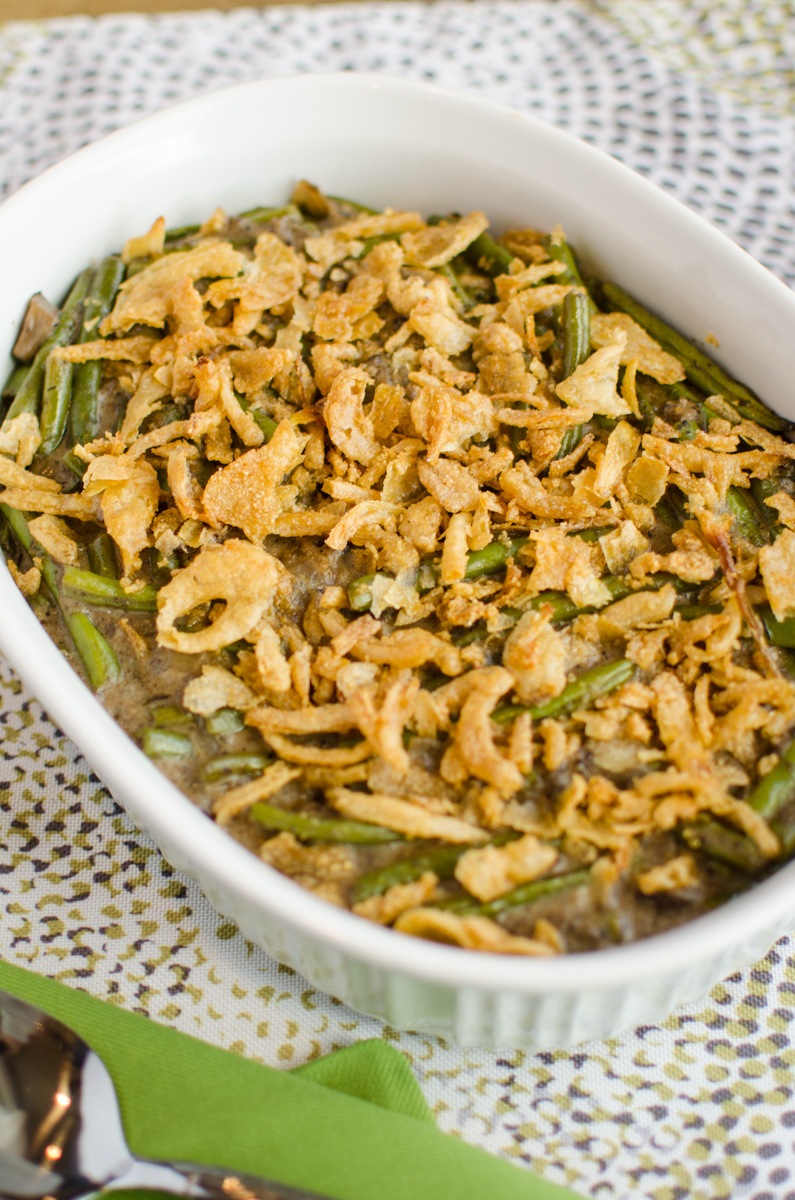
This Green Bean Casserole is thick and creamy with chunky mushrooms, full of flavor and crisp green beans. It is the best dairy and gluten free alternative to the traditional. This recipe serves 6 people, or more depending on their serving sizes. For time-saving on Thanksgiving you can prepare this up to mixing the sauce and green beans together. Then day off just pop it in the oven for 30 minutes and fry up your onions. I would definitely recommend doing the onions day of if you have time!
Ingredients
Green Beans
- 1 lb Fresh Green Beans
- 2 tablespoons Olive oil
- 1/4 teaspoon Fine sea salt
- 1/8 teaspoon Ground pepper
Mushroom Sauce
- 2 tablespoons Ghee, butter or coconut oil
- 1 medium Yellow onion, diced- about 2 cups
- 12 ounces Mushrooms, baby portabella or white cut into quarter slices or put into a food processor for smaller pieces
- 1 can Full fat coconut milk, some cans are 13.66 to 14.5- just use a whole one!
- 1 cup Chicken Broth/ Stock sub vegetable broth for vegan/ vegetarian
- 1/2 tablespoon Dried Thyme
- 1/2 teaspoon Dried Sage
- 1-2 teaspoons Salt and Pepper, to taste *see note below on salt
Shallot Topping
- 4-5 Shallots, sliced into rings, about 2 cups
- 1 tablespoon Ghee, butter or coconut oil
Slurry
- 2 tablespoons Arrowroot Powder, Tapioca flour or Cassava flour
- 2 tablespoons Cold water
Instructions
-
A NOTE ON SALT: As I mentioned in a previous blog post, I like to salt my food in stages while cooking. It helps to break down food and give it more flavor as it is cooking. This means that I do a pinch or two on the onions, on the mushrooms and then taste and add salt to the final sauce as needed. That is why you must ALWAYS taste your food… there are too many variables that can be different with ingredients. Your broth may have more salt, your coconut milk may be sweeter. So what may work for one set of ingredients will not for another. If you don’t already salt as you go, I highly recommend it, I notice that I use less salt overall when doing that. But the most important rule is to ALWAYS taste your food before salting! That is why I give a general range of 1-2 teaspoons, especially in this recipe.
-
First pre-heat the oven to 350. Then, prepare the green beans. Trim off the ends and cut in half. Toss with the oil, salt and pepper. Place onto a parchment lined baking sheet and roast for 30 minutes.
-
While the beans are in the oven, chop up the rest of your ingredients: onions, mushrooms and shallots. To cut your mushrooms: cut them in half, and then slice the halves into 4 or so slices. Alternatively you can also process them in a food processor for smaller chunks.
-
Heat up a pan on medium high heat and when hot melt your 2 tablespoons of ghee/ butter/ coco oil. Once melted add the onions and sprinkle with a pinch of salt. Cook for about 5 minutes until the onions become translucent.
-
Once melted add the onions and mushrooms. Sprinkle with a pinch of salt. Allow the mushrooms and onions to caramelize, cooking for 10-15 minutes. If they are still releasing a lot of liquid, you can continue to cook until that steams off.
-
Once the onions and mushrooms have reached a beautiful brown, caramelized look add the chicken broth first, then the rest of the ingredients: coconut milk, thyme, and sage. TASTE your sauce and add salt and pepper as needed. Bring the sauce to a simmer for 5 minutes.
-
While the sauce is simmering make your slurry! The slurry helps the arrowroot/ tapioca/ cassava to dissolve and thicken the sauce without clumping. Mix the flour and water until you have a milky smooth liquid.
-
Pour in the slurry while stirring vigorously. Give the sauce another couple of minutes to thicken. If the sauce isn’t to the thickness you desire just add more slurry in a ratio of 1:1 – so if you just wanted a little more thickness add 1 tsp arrowroot & 1 tsp water. BUT keep in mind that once the sauce cools it will become thicker!
-
Once your sauce is nice and thick, mix with the green beans and place in an oven safe dish- I used a 1.4 liter casserole dish. Bake for 30 minutes.
-
While the casserole is baking, cook the onions. Use a pan on medium heat, once hot add your cooking fat. When melted add your onions and spread out evenly, sprinkle with salt if desired. Try not to stir the onions too frequently, you want them to sweat out and then get a little brown and crispy. If this is happening too fast, turn the heat down. The onions should be just about ready when the 30 mins is up on the casserole. Alternatively, they have great gluten free crispy onions now you can buy at the store for a traditional feel!
-
When the casserole is ready, take it out of the oven, sprinkle the onions over top and put it back in the oven for 5 minutes. Serve immediately!